

How To Set Up A Photo Booth With A Dslr
How to gear up your own photo studio
Why waste matter your precious time on concrete photography when you tin can do so much in Photoshop? Well, because experimenting with physical tools – lights, gels, diffusers, backdrops and reflectors – tin create crisp furnishings that are very hard to imitation well digitally. Professional commercial photography combines concrete and digital elements. Information technology's often quicker and more intuitive to set upwards a scene physically, instead of trying to simulated it in Photoshop – and it's easier to tidy up a scene in Photoshop if you starting time with a clean, well-lit source image.
The offset question to ask is whether you want to concentrate on people or objects. Portraits and product shots crave different skills and styles. If you concentrate on one or the other, y'all might need to select different equipment.
The hole-and-corner of good product shots is fifty-fifty lighting and absolute cleanliness. Look at any professional magazine or catalogue shoot and you'll immediately run into that information technology'due south spotless. In that location is no dust, no blemishes, no fingerprints or imperfections. Y'all tin faux that look in Photoshop with methodical cloning and spot healing, but it's faster to start with an object that's physically uncontaminated. Elementary and cheap cleaning tools – small paintbrushes, air blower aerosols, and a disposable fabric – aren't glamorous only are essential.
The other key element with photography is even lighting. Products are often shot 'on white' with a clean, white background and no difficult shadows. On-photographic camera wink is useless for this look, because it creates too much front-back contrast and excessively sharp shadows.
A simple and very cheap trick is to cut off a couple of sides effectually a cardboard box, leaving a floor and sides. Line the walls with photocopier paper, and light them with near any convenient light sources. For a horizon-free curved properties, record some A3 or A4 to the top of the box and bend it under the object on the floor. With careful placing you can bounce the lights off the newspaper to create a smooth look.
For a more professional approach, use a light tent: a pocketbook or box made of white material that helps diffuse light around an object, giving a smooth and sophisticated even glow. Light tents commonly have a pigsty in one side for shooting, while the other sides act as a diffuser. Prices start from around £25, and you tin find many examples online. The more sophisticated models include single-colour detachable backdrops for a wider range of effects.
Portrait and larger-scene photos are more challenging, and you lot need more equipment to practise them well. Where products need even lighting, model portraits are more varied, and polish lighting is but one of many possible starting points. For maximum flexibility you demand at least two independent low-cal sources. Professional studio lights – from £200 upwards – simulate daylight. They also come up with several attachments including umbrellas – the light bounces backwards off the within – and soft boxes, which are giant diffusers.
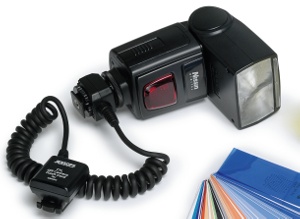
Point source lighting on-camera wink is nigh useless for portraits, so don't call up of diffusers and reflectors as extras. It's difficult to get good results without them but, if you're on a budget, y'all can fake similar results with a adept handheld flash on a cable that can be pointed away from a model to bounciness low-cal off walls, the ceiling or the floor. You lot tin also use a handheld reflector to control flash bounce in a more deliberate and intense way, although you may demand an assistant to assist, and you'll almost certainly need to experiment to become a good consequence. Subtle side- or uplighting is often used to make models look more glamorous and stylised.
What to go for and what you lot should pay
The camera
Yous'll get creamy-smooth results with a mid or high-end SLR, but almost whatever camera that costs £350 or more than is fine for photograph studio work, as long as yous can run images through a noise reduction filter in Photoshop, such as
Noise Ninja
.
The lights
Professional photo studio lights cost from £200 and are daylight-counterbalanced for make clean output. For a cheap alternative, endeavor a couple of architect'southward lights from any DIY store for around £ten each, and prepare the balance in Photoshop. You could also grab one of the best band lights, many of which are highly affordable now.
The gear up
Backdrops can exist apparently white, textured or coloured. For avant-garde effects you tin can as well use reflectors to focus calorie-free or colour on a specific spot. Backdrops come up on rolls, and a rack of rolls is a standard characteristic in professional person studios. For a cheaper result when shooting small objects, you can utilize white, coloured or textured paper.
Brilliant studio lights tin be hot and distracting, so professionals frequently use high-powered studio flash instead. Combined with diffusers and reflectors, studio flash is a professional person solution and costs appropriately. Expect to pay effectually £400 for a reasonable entry-level bundle, and so more than if you want advanced extras, such as calorie-free, sound or even WiFi-controlled triggers. Check out an equipment manufacturer like Calumet Photographic for a full range of professional person photo kit.
With large units, portability and movement become an issue. Static studio lights and studio flash demand to be positioned carefully, both vertically and horizontally, for maximum creative potential. Y'all can also set upwards two or more than light units to produce dissimilar levels of light output for deliberate command of light and shade. Near lights include basic stands, only professional studios use a rail and pulley system that makes it possible to place the light where you need it. You probably won't need to invest in the full organisation unless you spend most of your fourth dimension doing photography. But information technology's useful to know that it'southward a possibility, and also to know how to use it if you lot book someone else'south professional person studio for a shoot.
For close-ups, a useful extra is a band flash, which fits around your camera's lens and produces smooth but bright confront-on lighting. Ring flash isn't inexpensive – prices start effectually £200 – and you lot need to discover a model that fits the lens on your compact or SLR. But if you notice yourself being commissioned to practice a lot of work that needs head and shoulder or full-face shots, it should soon pay for itself. And the divergence in quality is unmistakable.
The lesser line with creative photography is that while pro-level kit is expensive but powerful, you can have a lot of fun and produce some impressive results with much cheaper kit. Apply some imagination and inventiveness to your projects, and there are virtually no limits on what yous tin can achieve.
Related manufactures

How To Set Up A Photo Booth With A Dslr,
Source: https://www.creativebloq.com/computer-arts/how-set-your-own-photo-studio-11118439
Posted by: wilhitecheyetch.blogspot.com
0 Response to "How To Set Up A Photo Booth With A Dslr"
Post a Comment